 Bellingham Siding
 New-Construction Windows in Birchwood: More Additions and Infill Than Big Subdivisions
Most of the new-construction window work we do in Birchwood isn't happening on a bare lot in a new subdivision. It's happening on additions, second-story pop-tops, garage conversions, ADUs, and full remodels where an exterior wall gets opened up to the studs so a room can grow or a floor plan can finally work the way a family actually lives. Birchwood is an established, in-town Bellingham neighborhood, and most of the lots were built out years ago — so "new construction" here usually means a section of an existing home getting rebuilt from the framing out, not a whole house going up from a cleared foundation.
That distinction matters more than it sounds like it should. A new-construction window — the kind with a nailing fin built into the frame — gets installed the same way whether it's going into a brand-new house or a single new opening cut into a forty-year-old wall. But the surrounding conditions are different. On an addition, the new window has to tie into old siding, old flashing, and sometimes old framing that wasn't built to current standards. Getting that transition right is the part of the job that separates a clean, dry addition from one that leaks at the seam between old and new within a few wet seasons.
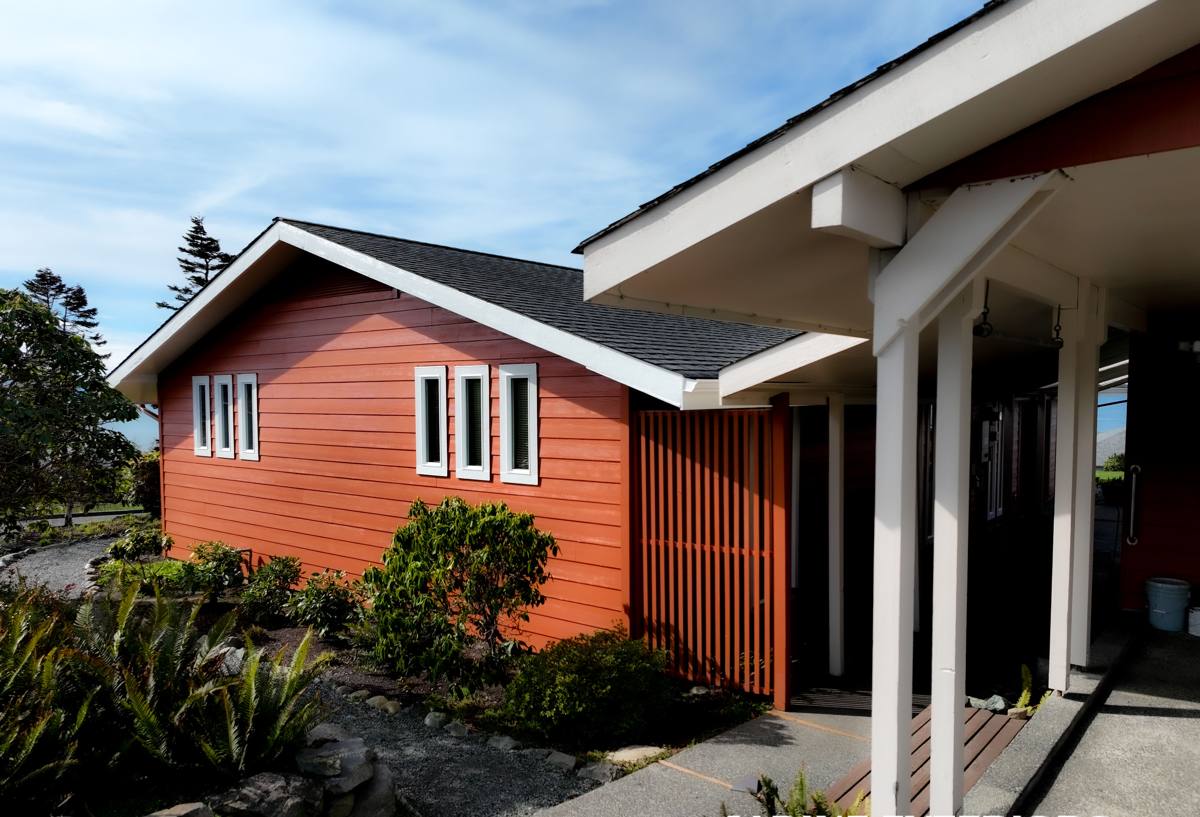
New-Construction Windows vs. Replacement Windows
These are two different products installed two different ways, and mixing them up on a project is a common and costly mistake. A new-construction window has a nailing fin that fastens directly to the framing before the weather-resistive barrier and siding go on — it becomes part of the wall's drainage system, built in layers as the wall goes together. A replacement or insert window is made to drop into an existing, already-finished opening without disturbing the surrounding siding or trim, using a different sealing approach because the wall around it is already closed up.
If you're adding a room, converting a garage, building an ADU, or opening up a wall for bigger windows, you need the new-construction product and the framing-stage installation sequence that goes with it — not a replacement unit forced into a rough opening it wasn't designed for. We sort out which category a project actually falls into during the first walkthrough, because guessing wrong here is expensive to fix later.
Why Birchwood's Climate Changes the Job
Birchwood sits back from the waterfront, but it's still inside Bellingham's marine-influenced climate, and that shows up in how a new window opening has to be built.
Salt Air and Hardware Corrosion
Salt-tinged air moves through this whole part of Whatcom County, not just the properties directly on the water, and it works on unprotected hardware, fasteners, and lower-grade flashing metal over years of exposure. On a new opening, that means specifying corrosion-resistant fasteners and flashing components from the start, rather than finding out a decade from now that budget-grade hardware pitted and seized on the elevations that catch the worst of it.
Driving Rain
Rain in this region doesn't fall straight down for long. Wind pushes it sideways and up into window openings, which is exactly the movement a flat, uncambered sill or a caulk-only seal isn't built to handle. Every new opening needs a sill pan that actually sheds water outward, not one that just looks finished from the inside.
A Long Moss Season and Mature Tree Cover
Birchwood's older, in-town lots tend to have more mature trees and more shaded wall sections than a new subdivision built on a cleared site, and that shade holds moisture longer through the region's long moss season. Sills and lower window corners on north-facing or heavily shaded walls are where that moisture sits the longest, which is exactly where drainage detailing matters most.
What a Correct New-Construction Window Install Involves
The sequence below is what separates a window opening that stays dry for decades from one that starts showing problems within a few wet seasons — and skipping a step rarely shows up until well after the wall is closed in.
Rough Opening Prep
The opening has to be framed square, plumb, and sized correctly for the window unit before anything else happens. On an addition tying into older framing, this is also where we typically find out whether the existing structure needs any correction before a new opening can be cut in cleanly.
Sill Pan Flashing
A properly formed, pitched sill pan goes in first, sloped to carry any water that gets past the window outward and away from the framing — not left flat where water can pool under the frame.
Setting the Window and the Nailing Fin
The window is set into the opening, checked for level, plumb, and square, and the nailing fin is fastened to the framing in the manufacturer's specified pattern, using corrosion-resistant fasteners suited to this climate.
WRB and Flashing Integration
Flashing tape and the weather-resistive barrier have to be layered in the correct shingle-lap order — sill first, then jambs, then head flashing lapped over the top — so any water that reaches the wall behind the siding drains down and out instead of getting trapped behind the frame.
Tying New Openings Into Existing Siding
This step is specific to addition and remodel work and it's where a lot of otherwise-good window installs go wrong. A new opening's flashing has to be woven correctly into the old wall's existing weather barrier and siding, not just butted up against it and caulked. Done right, water moving down the old wall and water moving down the new opening both end up going the same direction — out. Done wrong, that seam becomes the one spot on the whole addition where water finds a way in.
Interior Air Sealing and Insulation
Once the exterior sequence is complete, the gap between the window frame and the rough opening gets sealed and insulated from the inside without trapping moisture against the framing, keeping the assembly both efficient and dry.
Choosing Frame Material and Glazing for This Climate
Vinyl, fiberglass, and wood-clad frames all show up in Birchwood new-construction work, and each is a reasonable choice depending on the project. Vinyl performs well and keeps costs down when the installation is done correctly, though lower-grade vinyl can become brittle over years of sun and temperature swings on exposed elevations. Fiberglass costs more upfront but holds its shape and resists moisture and corrosion better than any other common frame material, which is why we lean toward it on additions with heavier weather exposure or larger window openings. Wood-clad frames give you a warmer interior look with a protected exterior finish, and they're a solid choice as long as the cladding and any exposed wood trim are properly detailed and maintained — an all-wood exterior finish is the one thing we steer away from on weather-facing walls in this climate, simply because the ongoing upkeep doesn't make sense next to the low-maintenance alternatives.
On glazing, low-E coatings and argon fill are standard on anything we install, and any window package has to meet current Washington State Energy Code U-factor requirements. Beyond the code minimum, it's worth thinking about which elevation the new window faces — a shaded, north-facing addition wall doesn't need the same solar-control glazing as a south- or west-facing wall catching direct sun, and we'll walk through that difference rather than specifying the same glass package across every opening.
What Drives the Cost of a Birchwood New-Construction Window Project
| Cost Factor | Why It Moves the Price |
|---|---|
| Number and size of openings | More openings and larger units mean more material, more flashing linear footage, and more labor time |
| Frame material | Vinyl is generally the most affordable option; fiberglass and wood-clad cost more upfront but offer different durability and appearance trade-offs |
| Tie-in complexity | A brand-new wall is simpler to flash than an addition wall that has to weave new flashing into existing siding and an older weather barrier |
| Structural framing needs | Larger openings, especially on additions or remodels, sometimes require added headers or framing support beyond a standard opening |
| Access and site conditions | Tighter in-town lots, mature landscaping, and limited staging space can add time compared to an open new-build site |
| Glazing package | Upgraded low-E coatings or solar-control glass for sun-exposed elevations add cost over a standard glass package |
We'll walk through which of these actually applies to your project during the first visit, rather than quoting a flat per-window number that doesn't account for what your specific opening needs.
Our Process for Birchwood Projects
- Site visit and assessment: We look at the existing wall or framing, discuss what you're trying to accomplish, and identify anything — old framing, existing flashing, structural questions — that will affect the new opening.
- Plan review and product selection: For addition and remodel work, we confirm rough opening sizes against your plans or your general contractor's plans, and walk through frame material and glazing options.
- Scheduling with the build sequence: Windows go in at the correct point — after framing is complete and before siding closes the wall in — whether that's on your timeline or coordinated with your GC's.
- Sill pan, window set, and fin fastening: Each opening is prepped, the window is set square and plumb, and the nailing fin is fastened per specification.
- Flashing and tie-in: Sill, jamb, and head flashing go in in the correct lapped order, with special attention to weaving new flashing into any existing wall assembly on addition and remodel work.
- Quality check before siding: We walk every opening before siding closes it up, since this is the last point a flashing detail can be corrected without tearing into finished exterior work.
- Final walkthrough: Once siding and trim are complete, we check window operation, hardware, and visible seals with you.
Checklist Before You Break Ground on an Addition or Infill Build
- Confirm whether your project needs new-construction windows or replacement units — they're not interchangeable
- Ask how the contractor plans to tie new flashing into your home's existing siding and weather barrier
- Get rough opening sizes confirmed against actual field measurements, not just plan dimensions
- Ask whether any openings need added structural support beyond standard framing
- Confirm the frame material and glazing package match the sun exposure of each specific wall
- Verify current Washington contractor licensing, bonding, and active liability insurance
- Ask what permits and inspections the City of Bellingham requires for your specific project, and who's pulling them
- Get a written scope of work that separates the window unit's warranty from the installation labor warranty
Why Hiring a Crew That Already Works Birchwood Matters
A crew that regularly does new-construction window work in Birchwood has already dealt with the specific problem this neighborhood presents most often: tying a brand-new opening cleanly into an older home's existing wall assembly, on a lot that's usually tighter and more shaded than a cleared new-build site. That's a different skill than framing windows into a fresh subdivision house, and it's easy to get wrong if the crew doing it hasn't done it before — the seam between old and new is exactly where a rushed job shows up as a leak a few years later.
It also means working with a crew that's familiar with City of Bellingham permitting and inspection requirements for additions and remodels, understands how mature tree cover and shaded walls affect drainage decisions on specific elevations, and is still around locally if a warranty question comes up down the road.
If you're planning an addition, an ADU, or any project that means opening up an exterior wall for new windows in Birchwood, we're glad to take a look and walk through what your specific project needs. Use the form below to request a free, no-pressure estimate.